Tuesday, February 25, 2014

Quilting

Most instructions for quilting say something like "quilt as desired" at this point.  And that's why I didn't try quilting for years.  It seemed like some sort of magic.  It's not.

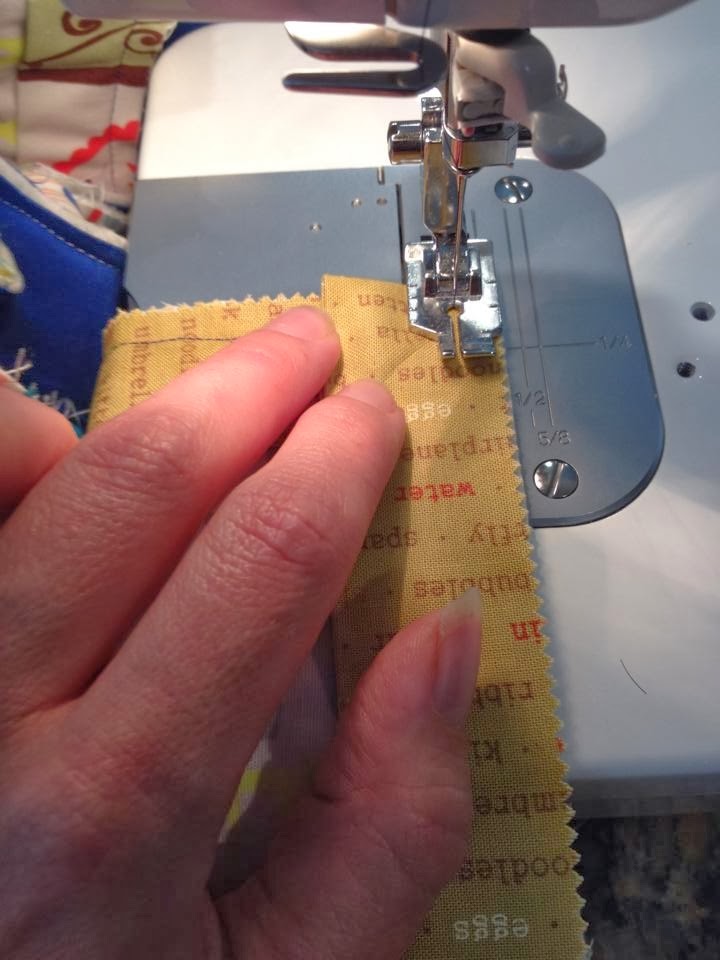
For this quilt, we just followed the lines of the squares and "stitched in the ditch" between the squares and sashing.  This is just using your regular machine and sewing lines.

Another option is meandering quilting or small loops.  Both are easy and require absolutely no amazing ability to draw.  There are tutorials all over the internet about this.


My favorite tutorial for free motion quilting is at http://www.youtube.com/watch?v=39I5A3iyCtw
It's a 4 part series, but gives a great overview of how to free motion quilt.

For stitch in the ditch, just use your machine as is, sewing right on your seam lines.

Now that you've finished quilting, it's time to trim and bind the quilt.  To trim, cut the batting and backing to the exact edge of the top of the quilt.

To bind your quilt, you're going to need 8 strips of fabric (width of the fabric - about 44"), each 2 1/4" wide.  Cut your 8 strips and then sew them together into one long strip.  For this quilt, we used a scrappy binding.  Iron the length of binding in half so the right side is out.


Now, it's time to pin the binding onto the quilt.  Pin it onto the back, starting at least 12" away from a corner.


For the corners, Oh Fransson has the best tutorial:
http://www.ohfransson.com/oh_fransson/2009/04/quilt-along-15-making-and-sewing-binding.html


When you have pinned around your quilt, you will have extra binding.  Cut each edge to have 1" extra and pin them together.


Once the binding is pinned, it's time to sew it.  Use a 1/4" seam allowance and sew all around the binding, starting about 6" from where you started pinning.

Here is a picture of sewing corners.  Sew to the fold and reinforce it.  Cut the thread, turn the quilt, and start at the corner fold again (refer to the Oh Fransson tutorial for excellent instructions).


When you almost reach the end, stop about 6" before the end of your binding.  Cut your thread, match up your binding ends and sew them together, and then go back and sew the last part of your binding to the quilt. 

At this point, you need to iron the binding to the front.  Make sure to iron evenly, not worrying too much about the corners.


Now, sew at the very, very edge of the binding, on the front of the quilt.  To make corners, fold one side over the other, but there's no need to stop stitching at corners; simply turn the quilt.

When you finish, wash your quilt with a Shout Color Catcher, and dry it.


Congratulations! 


Thursday, February 20, 2014

Now it's time to baste.

I spray baste.  Feel free to look online for steps if you'd prefer to pin baste.

For basting, I use 505 Basting Spray.  It's worth the extra cost - other sprays either don't hold or gunk up your needle.

Clear out a space on the floor big enough that you have at least 6" around all the edges of your backing.  Now, I use a tile floor and duct tape.  I used to use sewing pins and berber carpet.

Lay out the backing fabric with the right side down, and tape it to the floor.  Make sure it's fairly taunt but not stretched.


Now, lay out the batting on top of the backing.  This is an art, and takes awhile.  Don't stretch it tight, but make sure to smooth it from the center so there are no bumps or folds.


Now, smooth the quilt top over the batting, making sure it is on top of the batting and backing with no spots sticking off.


Now, pull back the quilt top and the batting together, from half of the quilt.  Spray the backing and slowly smooth the batting and top (held together) over the backing.  Then, spray the second half of the backing and smooth the other half.

Do the same for the quilt top.


When you finish, it will all be held together in a 'sandwich', ready for quilting.


Twin I-Spy Quilt

Every so often, there is an I-spy square swap on MLL, but I've heard from quite a few ladies that they have no idea what to make with the squares, or how to make the most of them.  Here's my favorite basic use for them: a twin I-spy quilt.

This quilt will finish at 66"x82", which is a great twin size.

Materials Needed:
80 I-spy squares, each cut to 6.5"x6.5"
2 1/4 yards solid fabric for sashing
twin cotton batting (or 72x90 if buying off the roll)
4yd backing fabric

DO NOT PREWASH ANYTHING.

Keep your solid fabric folded as it was on the bolt. Press. Cut strips of your solid fabric for sashing.  You will need 32 strips, selvage to selvage each 2.5" wide.


Next, choose your 80 favorite charm squares.


Sew sashing onto one side of each charm square using a 1/4" seam allowance.  I find this easiest to do in strips, and I cut them afterwards.


Iron the seam allowance toward your I-spy squares.


Now that you have strips of squares, cut them apart in straight lines.


Next, sew pairs of 2 squares together.  You will sew the sashing from one onto the charm square from the other.

(this is a photo of sets of 4.  I forgot to photograph the pairs)


Then, sew them together into strips of 4, and then into strips of 8.  While doing this, make sure that you don't have too many similar colors of themed squares together.  The idea of sewing a charm quilt is to make it look random, but


Now, you should have 10 strips, each with 8 squares.  Iron each strip with the seam toward the charm square.


When you reach this point, sew sashing onto the left edge of each strip, so there is sashing on both outside edges of your strips.

Now it's time to sew the remaining sashing strips together.  This will be what you sew onto each of your strips of 8 squares.  Once you sew all the sashing strips together, iron them.


Sew sashing onto the bottom of each set of 8 squares.  They will look like this:


Iron them.


Now, lay the strips out on the floor.  This is the time to figure out what looks good together.  I had lots of blues, so I tried to avoid too many blues in any one spot.


Now, sew the strips together to finish your quilt top.  Also, sew a sashing strip onto the top of the quilt, (the top of the top strip).